Installation Instructions
EMSPowered MR2 Harness Bar
EMSPowered Harness Bar Installation Guide
Toyota MR2 SW20 (1989-1999)
This guide is intended for use as an aid to installation. However it is not meant to be used to replace common sense or the installers lack of mechanical knowledge. If the procedures outlined or general mechanical knowledge is not available, it is highly recommended that a professional mechanic be obtained to do the installation of this product.
NOTE!!!! This Device is designed to be used in racing applications only and not intended for street use. It is not DOT approved. The OEM seatbelt provided by Toyota is still required and this product is not intended as a replacement for Toyota installed safety equipment.
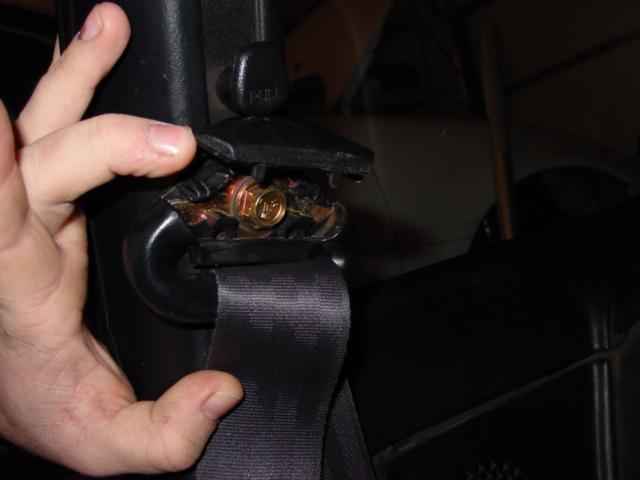
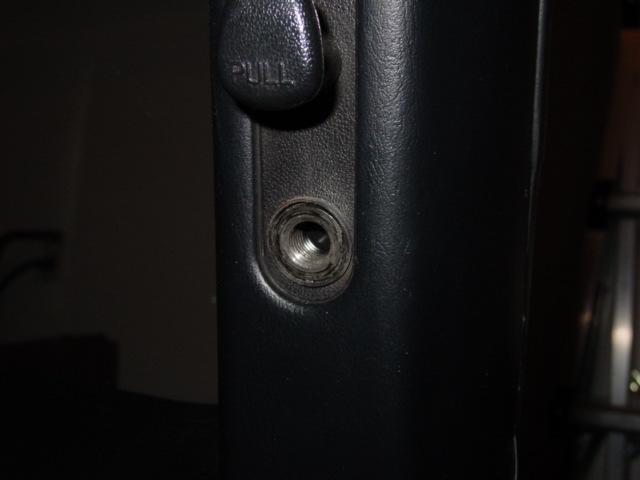
1 – Remove the plastic covers on the rear window trim as seen in the photo below

2 – Lift plastic covers over seatbelt bolts on factory shoulder harness and remove both sides with 14mm socket.
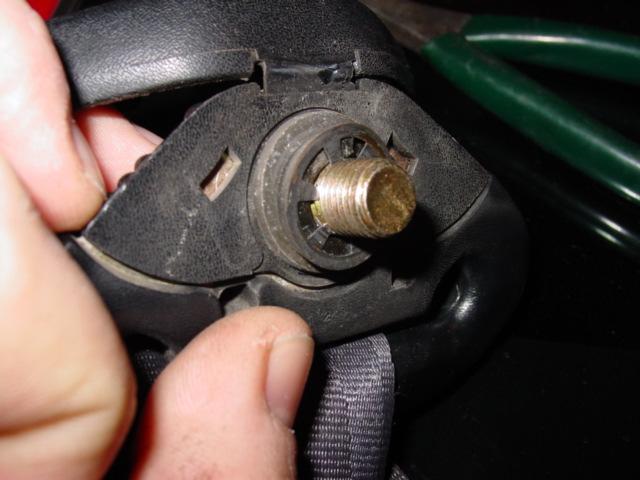
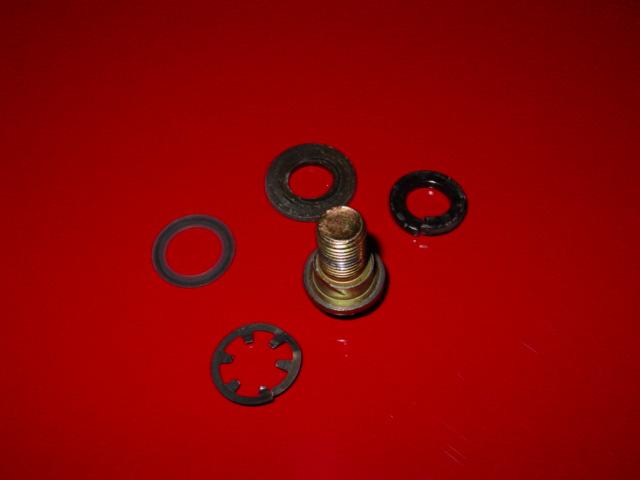
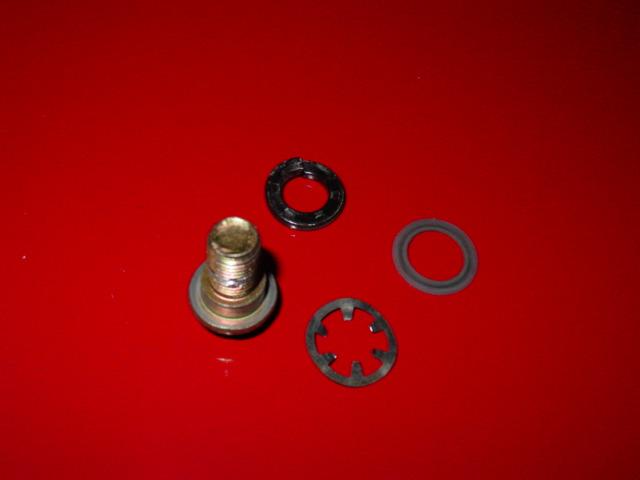
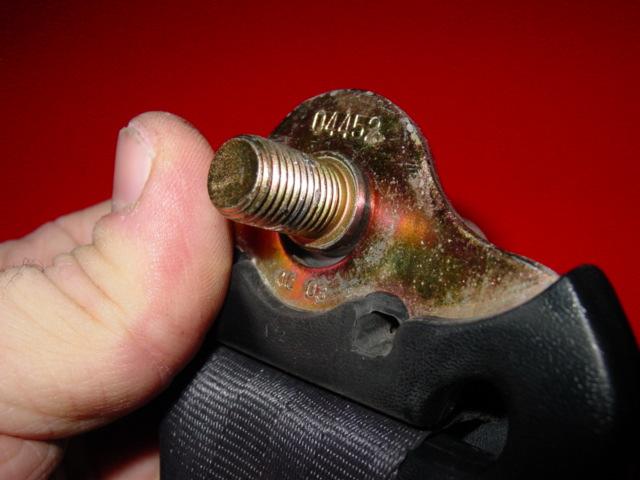
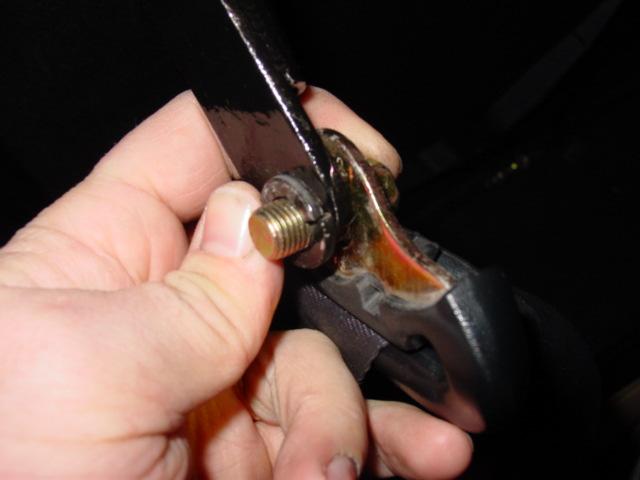
3. Remove retaining rings from bolts with a pair of pliers and place hardware to the side. Due to clearance you may wish to remove the plastic cover from the harness mount. If you choose to keep it, the plastic will rest on the new harness bar at an undesirable angle. In the photos below you can see the hardware that is removed and the second photo showing the hardware that will be reused.
4 – Place the shoulder harness mount sliders on their lowest notch.
5 – Install the harness bar into the car working with one side at a time. Place plastic washer onto bolt head and put the bolt into the shoulder harness hole and place assembly into harness bar hole with the lock washer on the backside of the bar as shown below.
6 – Thread bolt into mount BUT DO NOT TIGHTEN!!! Repeat the same for the other side.

7 – Adjust the sliders to the second or third notch up from the bottom. This is tough to do and requires a bit of a contortionist act to get it, but it can and has to be done. Pull on the bar, pull on the position knob and lift up at the same time. You may need a friend to help, but should be able to get it by yourself.
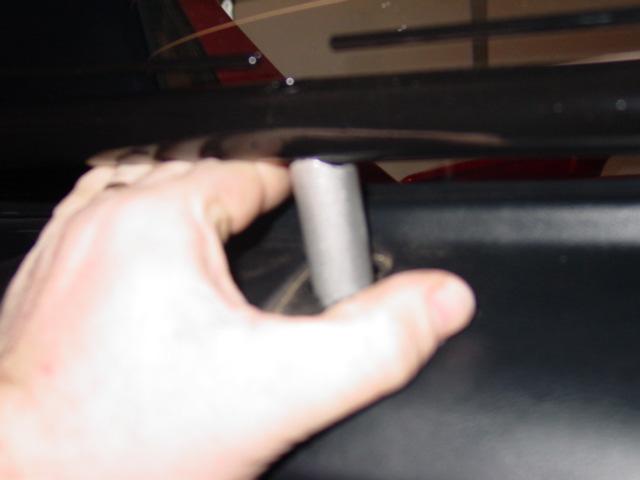
8 – Now install the spacers between the bar and rear firewall. Install the provided bolts through the bar and tighten.
9 – Tighten the two side bolts and your done! Enjoy!


Recent Comments