Installation Instructions for
EMSPowered Land Cruiser / LX450 FZJ80 Exhaust
1993-1997 Toyota Land Cruiser & Lexus LX450
Installation
Step 1) This step is sometimes the most difficult due to rusted bolts and nuts. It usually helps to soak the nuts/bolts several times before starting this step with a rust penetrating fluid such as PB Blaster (or other similar product). Remove your factory exhaust and rubber hangers. When removing the nuts that hold the y-pipe to the factory manifolds be careful not to strip them. These nuts will be reused to bolt the new y-pipe in place. (new nuts are included with your new EMSPowered exhaust incase your factory nuts are in bad shape).
Step 2) After you have removed the stock exhaust system it is now time to begin the installation of your new EMSPowered exhaust. Start by laying out all of the pieces.
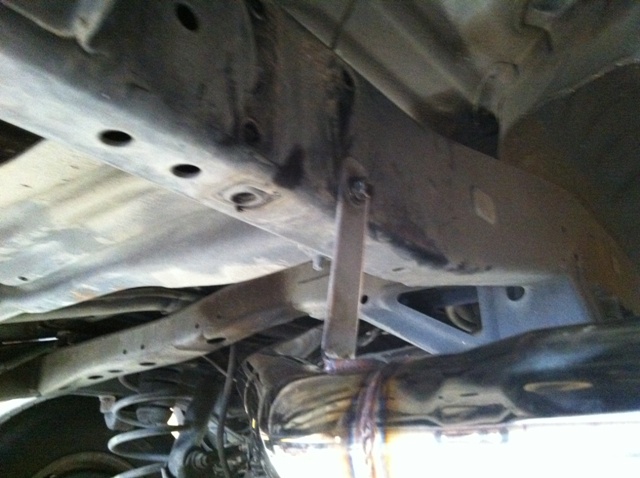
Step 3) First you will need some type of a cutting tool. You can use a cutoff wheel, a hacksaw, or anything that will cut through a bolt. You will need to cut the end off the bolt that protrudes downward through the front body mount directly under the passenger floorboard. Cut it flush with the nut. This is done to make maximum clearance for the y-pipe. The EMSPowered exhaust is tucked up as high as possible for maximum ground clearance.
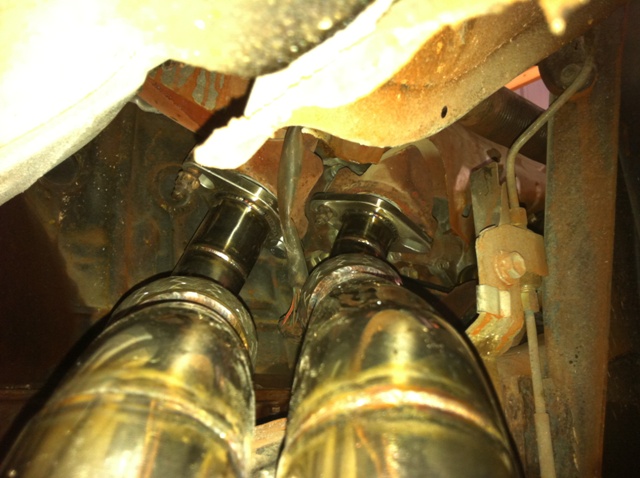
Step 4) The first part that you will work with is the new y-pipe. Place some RTV onto the factory “donut” gaskets and push them back into the exhaust manifold so that they stay in place. Place the y-pipe in position using the two included copper gaskets. Slide the y-pipe flanges over the studs protruding from the factory exhaust manifolds. Use the nuts to hold the y-pipe in place. Hand tighten them to make sure the gaskets stay in place but do not torque them down yet.
Step 4b) While installing the y-pipe make sure to support the weight of the catalytic converter end of the y-pipe in order to avoid damage to the flex sections in the y-pipe. Using zipties or the help of a friend, hold up the catalytic converter end of the y-pipe to support it’s weight and avoid stressing the flex sections.
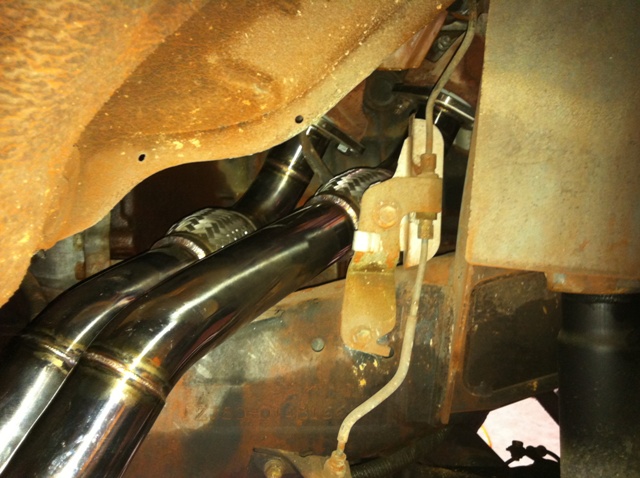

Step 5) Place the “over-the-frame” pipe in place. At this point DO NOT attach the “over-the-frame” pipe to the y-pipe yet. Simply put it in place and move onto the next step.
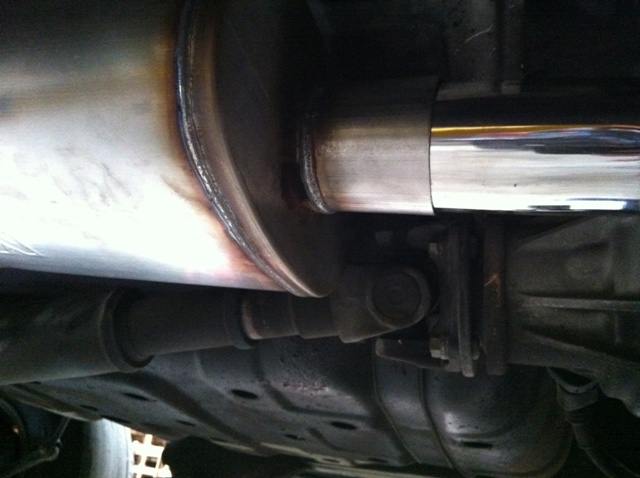
Step 6) Place the muffler assembly in place. You will need to turn and twist it to get it to slide into place over the rear suspension. Carefully slide the “over-the frame” pipe into the inlet of the muffler. The pipes are very snug, but will slide into eachother.

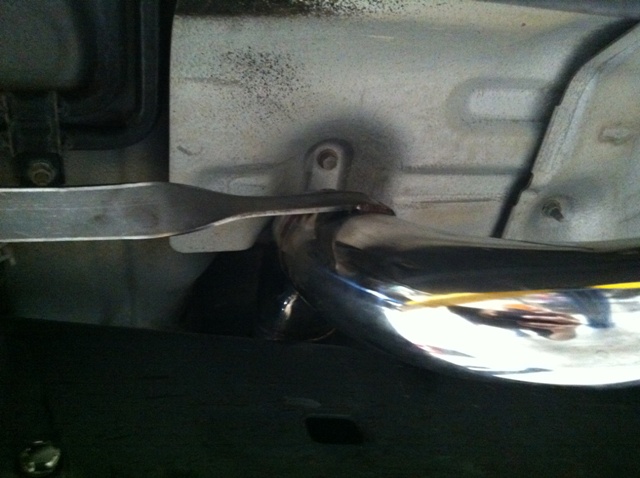
Step 7) Place your tailpipe assembly in place. Carefully slide the tailpipe section and muffler assembly exit pipe into each other. The pipes are very snug but will slide into each other. Use a stud and nut to secure the tailpipe exhaust hangers to the frame of the car. Leave them hand tight only to allow room for adjustment.
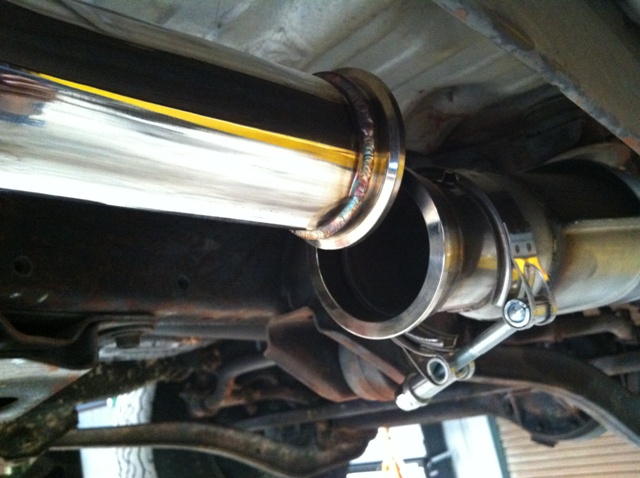
Step 8) Now that you have all of the pipes roughly in place it is time to start attaching them. Take the v-band clamp that came with your exhaust kit and place it over the flange after the catalytic converter and before the “over-the-frame” pipe. Position the two flanges so that they are lined up and centered on each other. Place the v-band clamp over the flange joint and slowly tighten the locking hex nut. DO NOT tighten it all the way yet, leave it loose enough so that the assemblies can be rotated slightly for adjustment. But not loose enough to where they will be off-center.

Step 9) Tighten the nuts that hold two y-pipe flanges onto the factory exhaust manifolds.
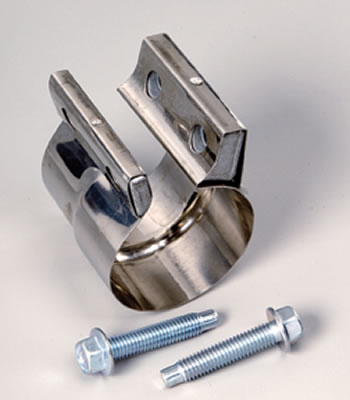
Step 10) Find the two stainless steel band clamps that came with your exhaust kit. Use one of the band clamps to secure the flange where the “over-the-frame” pipe and the muffler assembly come together, and the other one to secure the flange where the muffler assembly comes together with the tailpipe assembly. DO NOT tighten them all the way, leave them loose enough so that adjustments can be made.


Step 11) Tighten all of the bolts that hold the hangers onto the frame of the vehicle.

Step 12) Now that everything is in place, carefully tighten the locking hex nut on the v-band clamp that holds the flange between the y-pipe and “over-the-frame” pipe.
Step 13) Carefully tighten the stainless steel band clamp between the “over-the-frame” pipe and the muffler assembly.
Step 14) Carefully tighten the stainless steel band clamp between the muffler assembly and tailpipe assembly.
Step 15) Install the included stainless steel studs into the O2 sensor bungs on your new exhaust. Install your factory O2 sensors along with your O2 sensor gaskets using the included stainless steel nuts. On some years of the Land Cruiser / LX450 vehicles you may need to undo the last clip holding the O2 sensor wiring to the frame if it doesn’t reach easily. If this is the case on your vehicle the wires can be left intact, just undo the last clip that holds the wiring to the frame to give it more slack.
Step 16) Install the locking tabs and c-clips onto the 4 nuts that hold the y-pipe to the exhaust manifolds.
Important Installation Notes:
* Over the years the chassis tends to bend and tweak this way and that way. Because of this not every installation is exactly the same. We have designed the EMSPowered exhaust system to leave enough room for adjustment to allow you to get a perfect fit. While going through the final steps of the installation and tightening up all of the clamps and bolts, keep in mind that there is quite a bit of room for adjustment. If any of the pieces need to be moved slightly make sure to hold them in place while tightening down the clamps one by one. If you see the need to, you can always loosen up any of the clamps/bolts to make slight adjustments to get the piping to sit exactly where you’d like it.
* On some vehicles the y-pipe will line up perfectly. On some vehicles the y-pipe after the merge gets very close and sometimes will touch the end of the threads on the bodymount bolt protruding out of the mount underneath the truck. After installation inspect this portion of the y-pipe (right after the merge) to see if the body mount bolt gets too close. If it does we recommend trimming the end of the bolt up to the face of the nut.
* On some vehicles the rubber isolator that is attached to the transmission gets very close to the “over-the-frame” pipe. If you notice that the rubber isolator is touching the pipe you can do one of two things: 1) you can remove the rubber isolator by unbolting it from the transmission, or 2) you can use a file, dremel, sand paper or other abrasive to grind a small amount of rubber off of the rubber isolator to allow for more clearance for the pipe. (Note) design changes have been implemented in newer versions of the exhaust to allow more clearance in this area).
* When tightening the locking hex nut on the v-band clamp, make sure to go slowly. The locking mechanism creates friction and heat and if it is tightened too quickly the heat will fatigue the metal and possibly snap the threaded stud.


Recent Comments